Truffle Suite
In this tutorial, you'll learn how to deploy your smart contracts to a public Ethereum network using Truffle Teams.
Prerequisites
This tutorial assumes that you've already done the following: - Created a Truffle Teams account - Linked a repo that is a Truffle project (need a project? Grab our MetaCoin box with truffle unbox metacoin in an empty directory, and push that to your own repository) - Got a passing build within Truffle Teams - Grabbed some Ropsten Ether - Ensured you'll have a stable network connection
The Deployments Page
Head over to Truffle Teams.
On the left navigation bar, click the item near the top labelled DEPLOYMENTS next to the parachute icon.
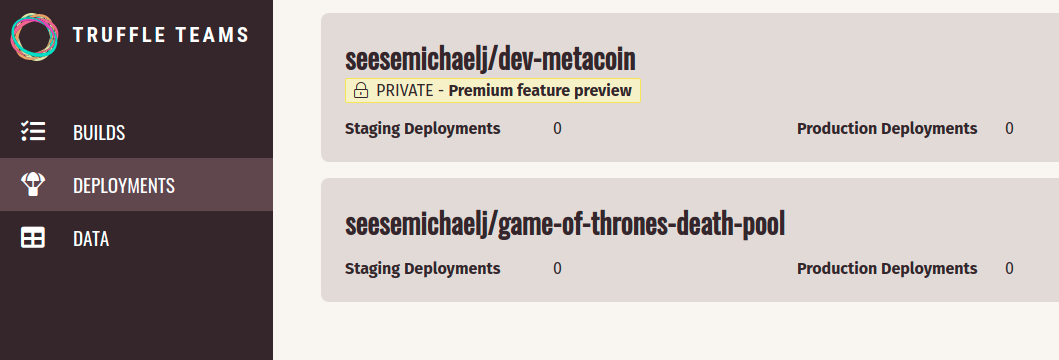
Here you'll see a list of your repositories. Click on the one you'd like to deploy.
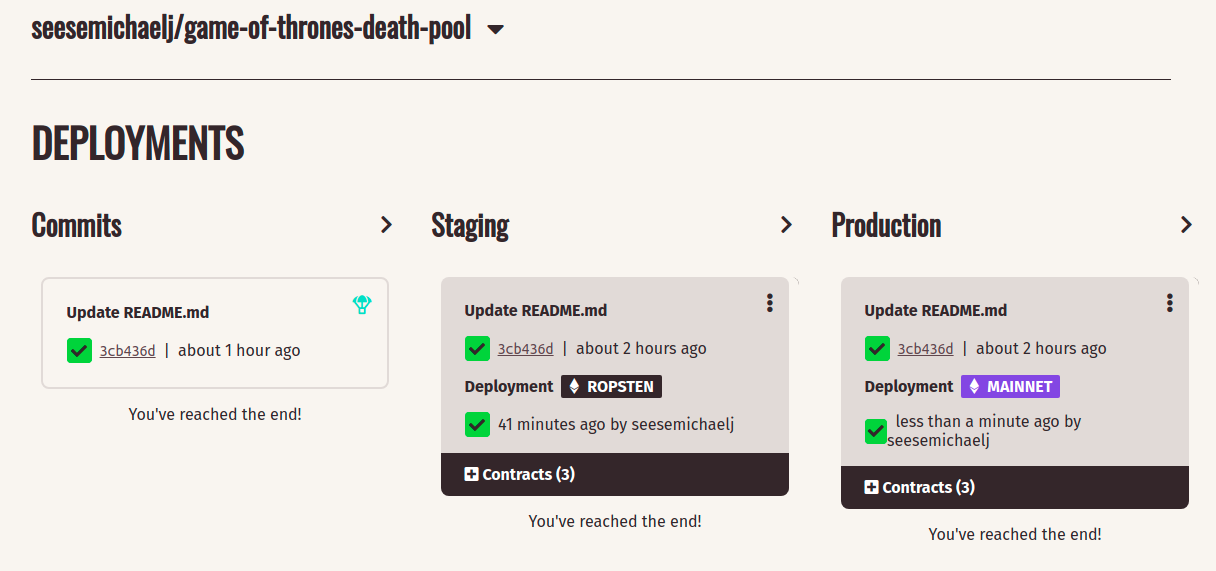
This will bring you to the deployments page. You'll notice there are three columns: Commits, Staging, and Production.
Commits Column
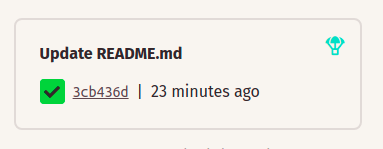
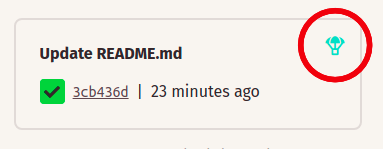
Commits is a list of all the commits that Truffle Teams is processing, or has processed, as a build. Each will have a status icon to show if the build is in progress, failed, or successful. Commits with a successful icon (a green box with a checkmark, as pictured) will be able to be deployed; the parachute icon in the top right of the commit indicates this.
Staging and Production Columns
Staging contains a list of all testnet (i.e. Ropsten, Görli, Rinkeby, and Kovan) deployments. Production contains a list of Mainnet deployments. We'll expand more on how these work later in the tutorial.
Your First Deployment
Currently, Truffle Teams supports Ethereum testnets and Mainnet, and we'll be adding support for other targets over time.
In this tutorial, we'll be deploying our application to Ropsten.
Press the parachute icon on the commit you'd like to deploy.
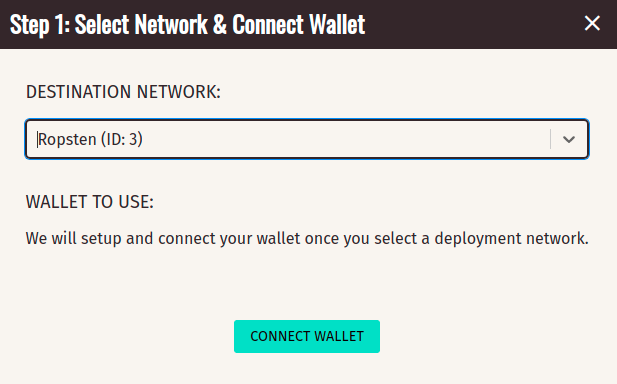
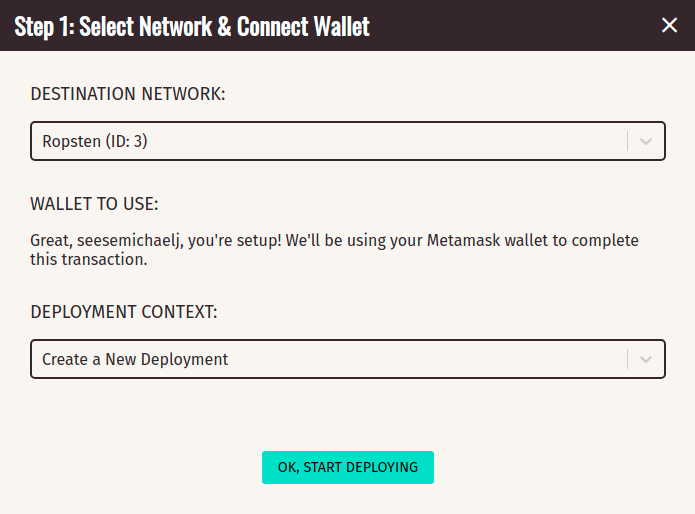
A wizard will pop up; under Destination Network, select Ropsten, and then press Connect Wallet.
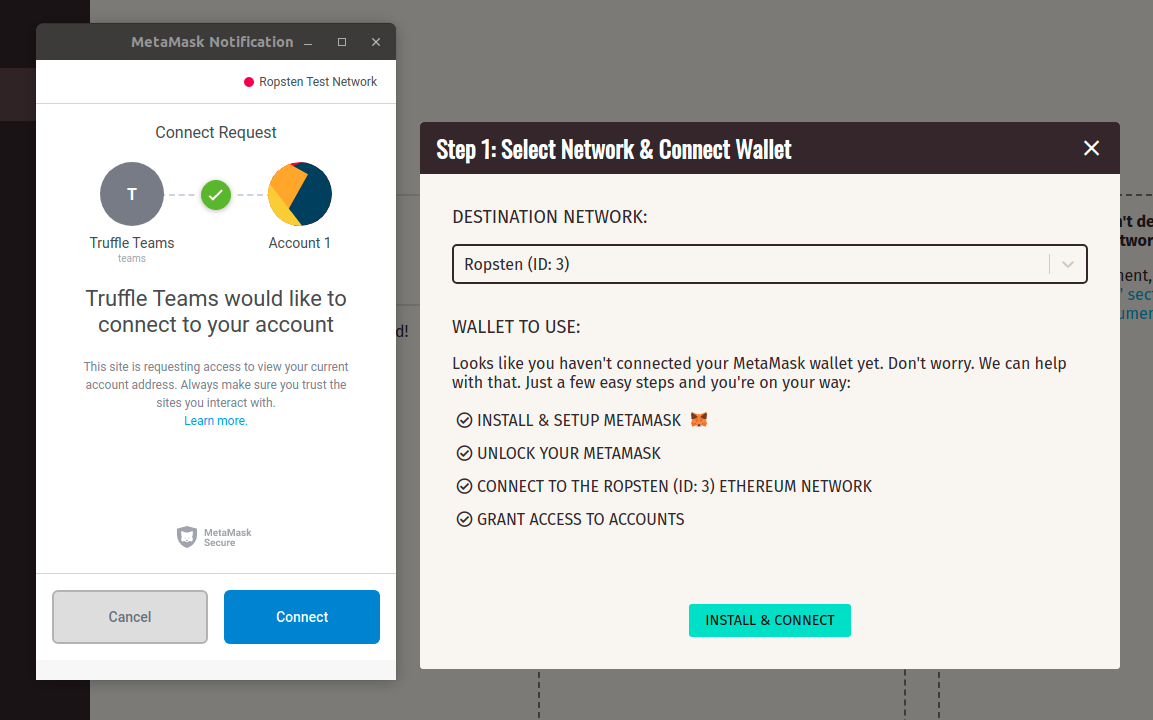
MetaMask will pop up asking you to login (if you haven't already). Then you will need to press Connect to confirm the connection with Truffle Teams.
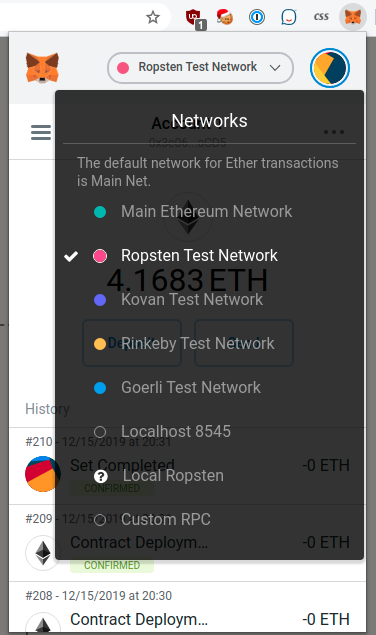
If the wizard hasn't changed (i.e. you don't see a button to start deploying), you likely need to switch your MetaMask network to Ropsten. This may reload the page; if this happens, you'll need to repeat the steps above.
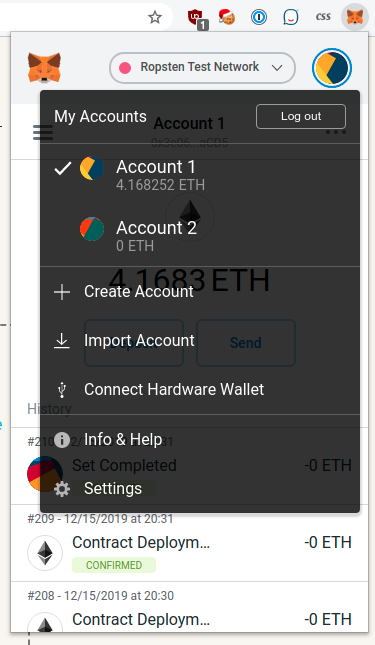
Before moving on, make sure you have the correct account selected in MetaMask.
Now you should see the wizard prompting for a Deployment Context. Leave it set to Create a New Deployment. We'll cover what this is later in the tutorial. Press the OK, START DEPLOYING button!
From here on, it's important that you don't close the tab, refresh the page, or lose network connection. We're working on a more robust experience that will enable you to pick up unfinished deployments, but for now our current version requires the tab to stay open and connected.
Truffle Teams will only process so many deployments at the same time, so you may see that your deployment has been queued. You'll have to wait (without closing/refreshing the tab) for your deployment to get to the front of the list. However, we're working diligently to make this experience more seamless going forward.
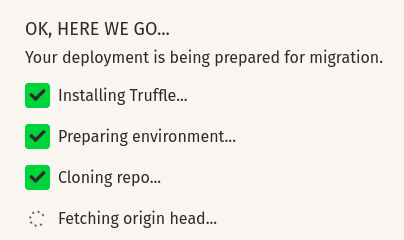
Once your deployment has started processing, you'll see a list of steps Truffle Teams is doing to prepare for your deployment.
Once the preparation steps are complete, you'll see a screen with a list of your migrations being processed. You should also get a pop-up from MetaMask for your first transaction.
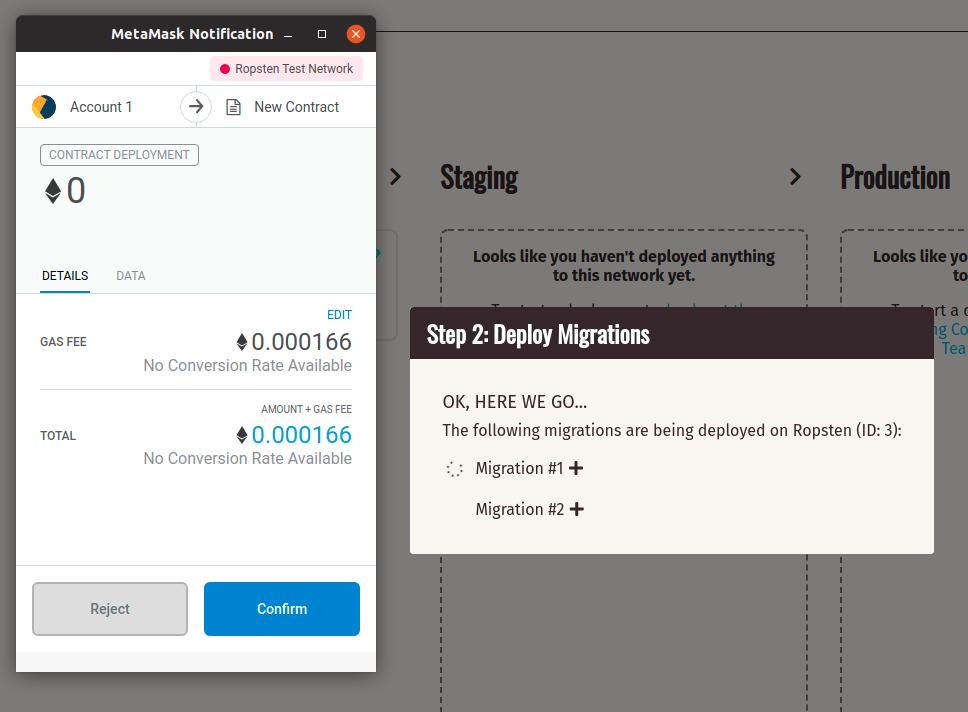
You'll notice that this interface with MetaMask is like sending a transaction to any other dapp. It's your account that is sending this transaction, and you have complete control of it. Additionally, we highly recommend that you change the GAS FEE to be higher so that your transactions run quicker. For testnets like Ropsten, it's affordable to always select the Fast option.

Once you're happy with the transaction gas fee, press the Confirm button to send your transaction. Once the transaction is confirmed (the timing of confirmations from MetaMask and Truffle Teams may be slightly offset), you'll receive the next transaction. Repeat this process until you see a message that your deployment is being finalized.
After a short wait, you'll see a window with your deployment results:
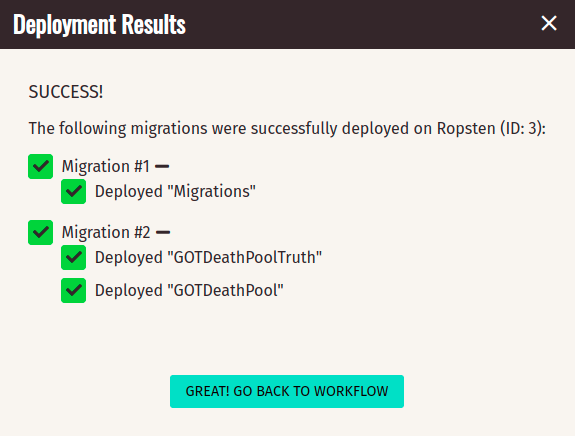
Your contracts are deployed! That was easy. Go ahead and push the Great! Go Back to Workflow button or the X in the wizard. You'll now see a new card in the Staging column with the results of your deployment:
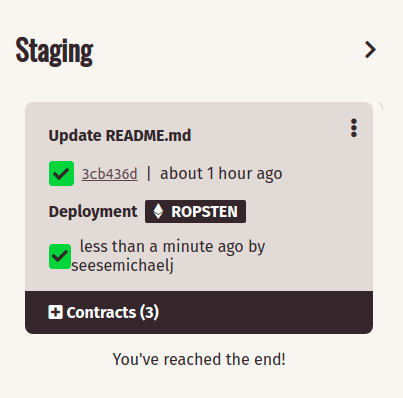
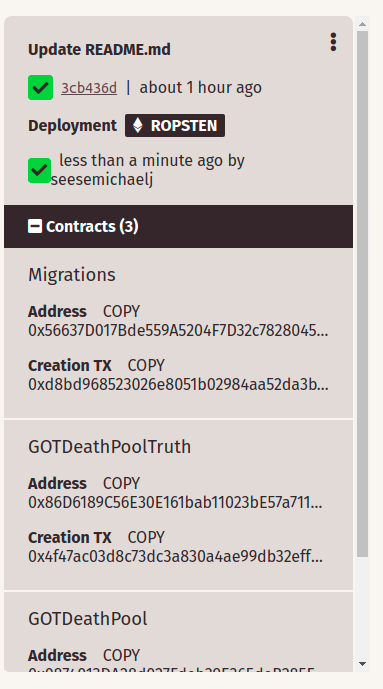
You can click on the + Contracts bar on the bottom of the card to see a list of your deployed contracts and their addresses:
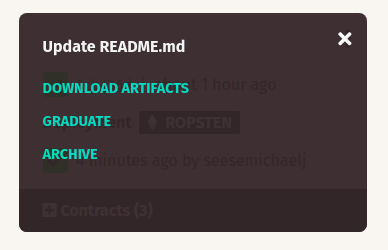
You can also click the vertical 3 dots in the top right of the card to find a menu. In this menu, you can download a .zip file of the Truffle .json artifacts used in your frontend webapp, graduate a deployment to production, or archive the deployment. Note: Be careful when using the archive feature; we haven't implemented a way to unarchive deployments yet.
Deployment Context
Circling back to the Deployment Context feature I brushed over earlier when we were setting up our deployment:
This setting will usually be used for more advanced Truffle applications that utilize the migration system to iteratively migrate more to the blockchain (rather than starting fresh each deployment).
This option will let you select an existing deployment on the same network that you'd like to use the deployed artifacts for. Truffle supports the concept of migrating your application and will only run the new migration scripts from the last deployment (a.k.a. the deployment context). This becomes useful in a handful of scenarios: maybe you added an extra contract to work with your existing deployment, your Truffle project uses proxy contracts to upgrade your contracts, and more. Technically speaking, selecting the Deployment Context will put the Truffle artifacts from the deployment context you selected in the directory before running truffle migrate.
Graduating Deployments
Happy with a particular deployment in Staging? You can select the Graduate option from the menu to use the same build as the basis of your deployment into Mainnet. Other than selecting a different network in MetaMask, the steps are the same! After you're done, you'll see a new deployment in the production section.